Templates & image library

Make every document feel like your practice.

Shape the clinical note, the letter back and the patient take-home around the way you work. Bring your own document or begin with a specialist starter, then choose how it fits the visit.

  • Your structure and voice
  • Practice and clinician defaults
  • Reusable educational images

Early access with guided setup for your practice.

Cascade Periodontics& Implant Surgery

Jane Smith · Fictional implant consultation

Understanding your consultation

A take-home explanation built around the reviewed visit.

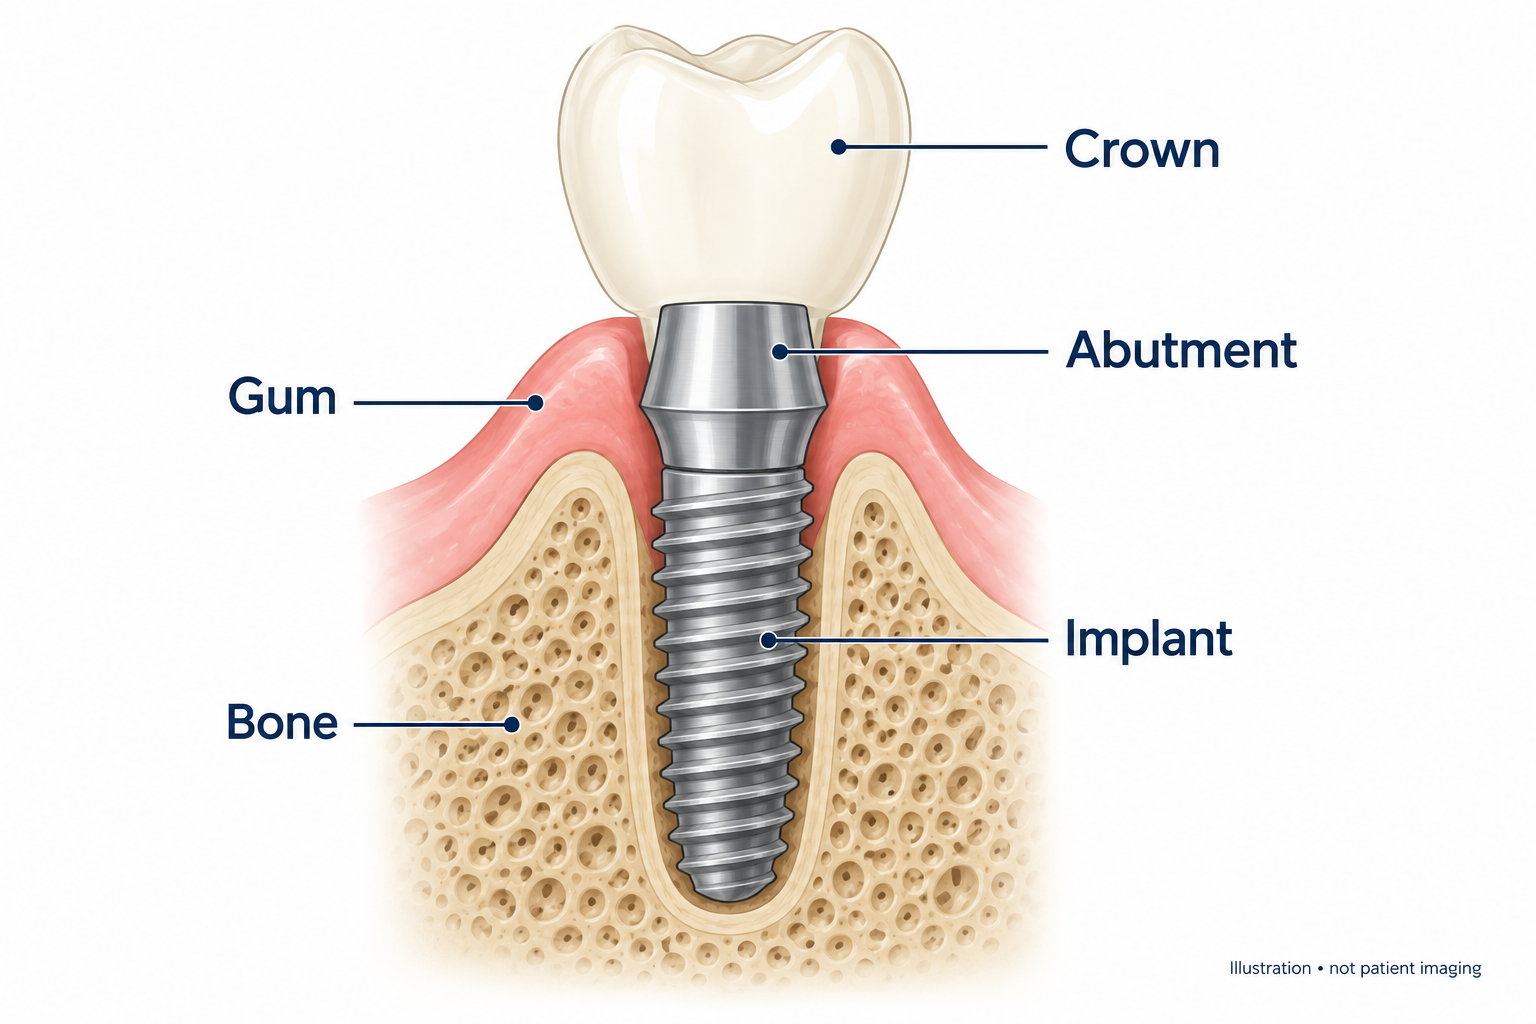
Educational illustration labeling the crown, abutment and implant

What we discussed

The options and questions reviewed during the consultation.

What happens next

The next step agreed with the doctor and the practice.

Illustrative layout · Not a generated patient record

A template should do more than hold your logo.

The same visit has different readers. Give each one a document with the right language, evidence and next step.

01

Start with something you would actually use.

Choose a specialist starter, upload an existing Word or PDF document, start blank or copy a template. Keep the headings and explanations your team already relies on, then adapt the parts that change from visit to visit.

02

Put the right evidence on the page.

Combine fixed practice wording, sections drafted from the visit, relevant clinical evidence and reusable images. An educational illustration explains anatomy or a procedure; the patient's chart and imaging remain the evidence for that patient's case.

03

Choose its place in the workflow.

Set the intended reader and when a template is used, including exams, dictation, procedures and hygiene visits. Practice and clinician selections let the team choose the appropriate document without rebuilding its structure each time.

04

Preview the result before using it.

Review the document, edit the wording and publish the version you want available for visits. Published templates and work in progress have different roles. Existing notes retain their version when a template changes.
From layout to practice use

Choose the page. Then choose when it is used.

Arrange the document around its reader, inspect the preview and select its place in the workflow.

Customize a templateIllustrative editor composition

Page blocks

  1. Practice header
  2. Patient-worded findings
  3. Educational image
  4. Plan and next steps
  5. Doctor signature
Cascade Periodontics& Implant Surgery

Jane Smith · Fictional implant consultation

Understanding your consultation

A take-home explanation built around the reviewed visit.

Educational illustration labeling the crown, abutment and implant

What we discussed

The options and questions reviewed during the consultation.

What happens next

The next step agreed with the doctor and the practice.

Illustrative layout · Not a generated patient record

Use this template

Made after
Exam
Reader
Patient
Practice use
Selected published version
Review
Preview before selecting use

Existing notes keep their version.

Conceptual layout of template and practice-use capabilities. This is not an editor screenshot or a completed generation.

The educational image library

A useful picture, ready when the explanation needs it.

22 illustrations across implants, wisdom teeth and extractions, gum and bone care, and root canal treatment. Add your practice's reusable images alongside the shared library.

Implant anatomy educational illustration

Implant anatomy

Explain the parts of an implant restoration.

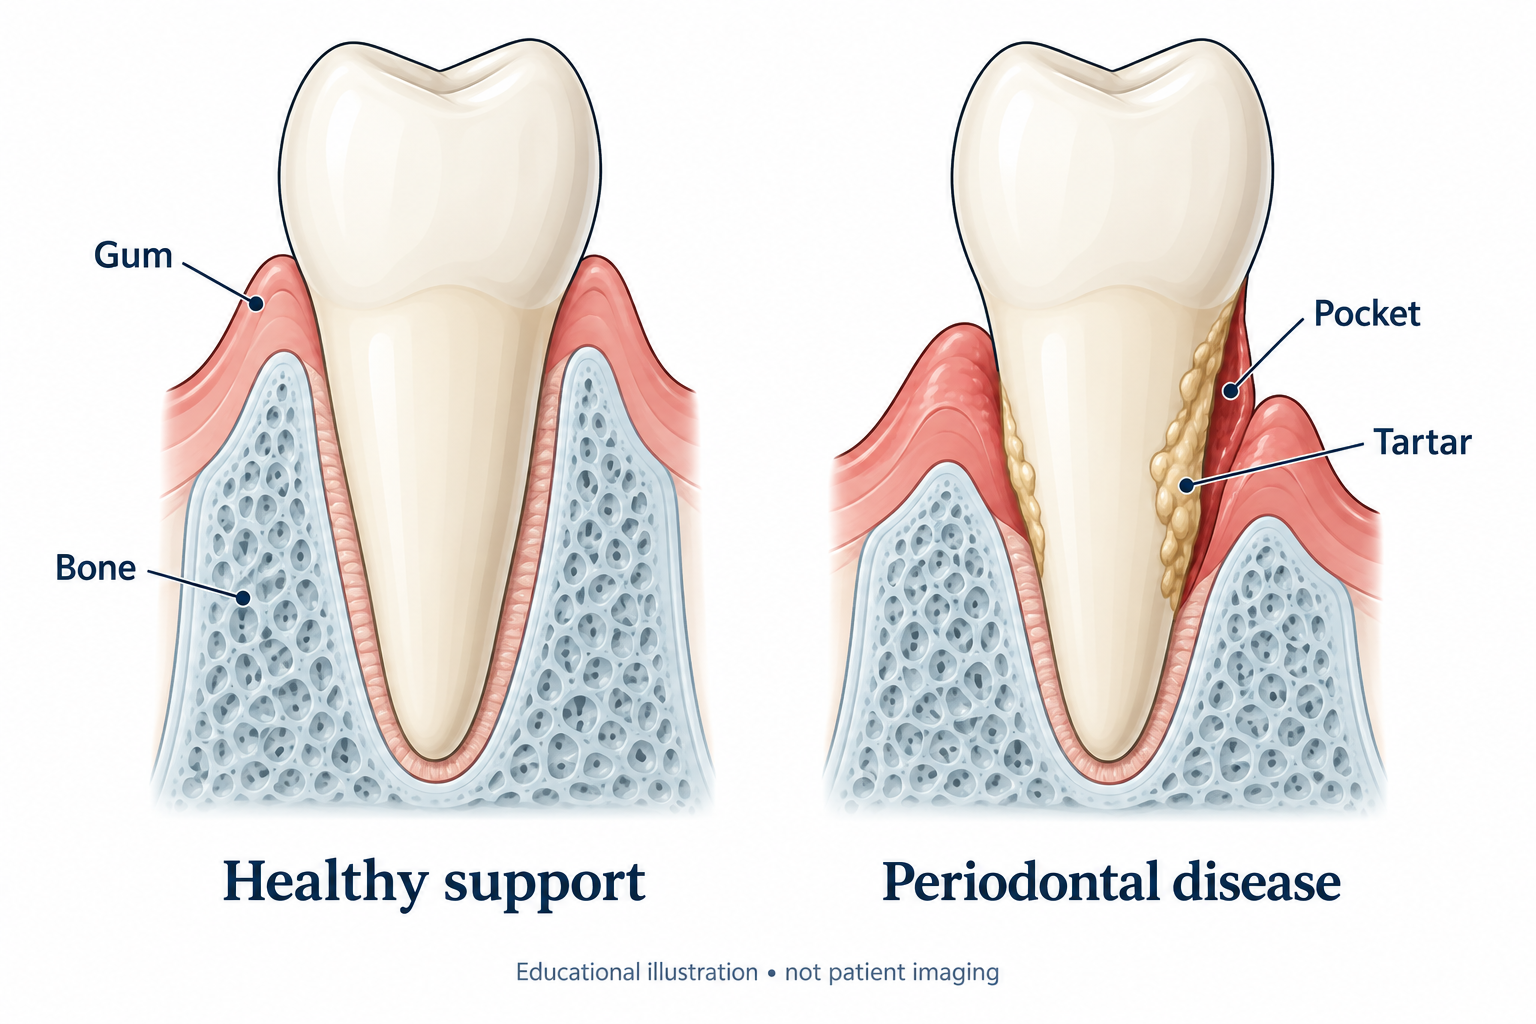
Gums, bone and support educational illustration

Gums, bone and support

Give a visual starting point for the periodontal discussion.

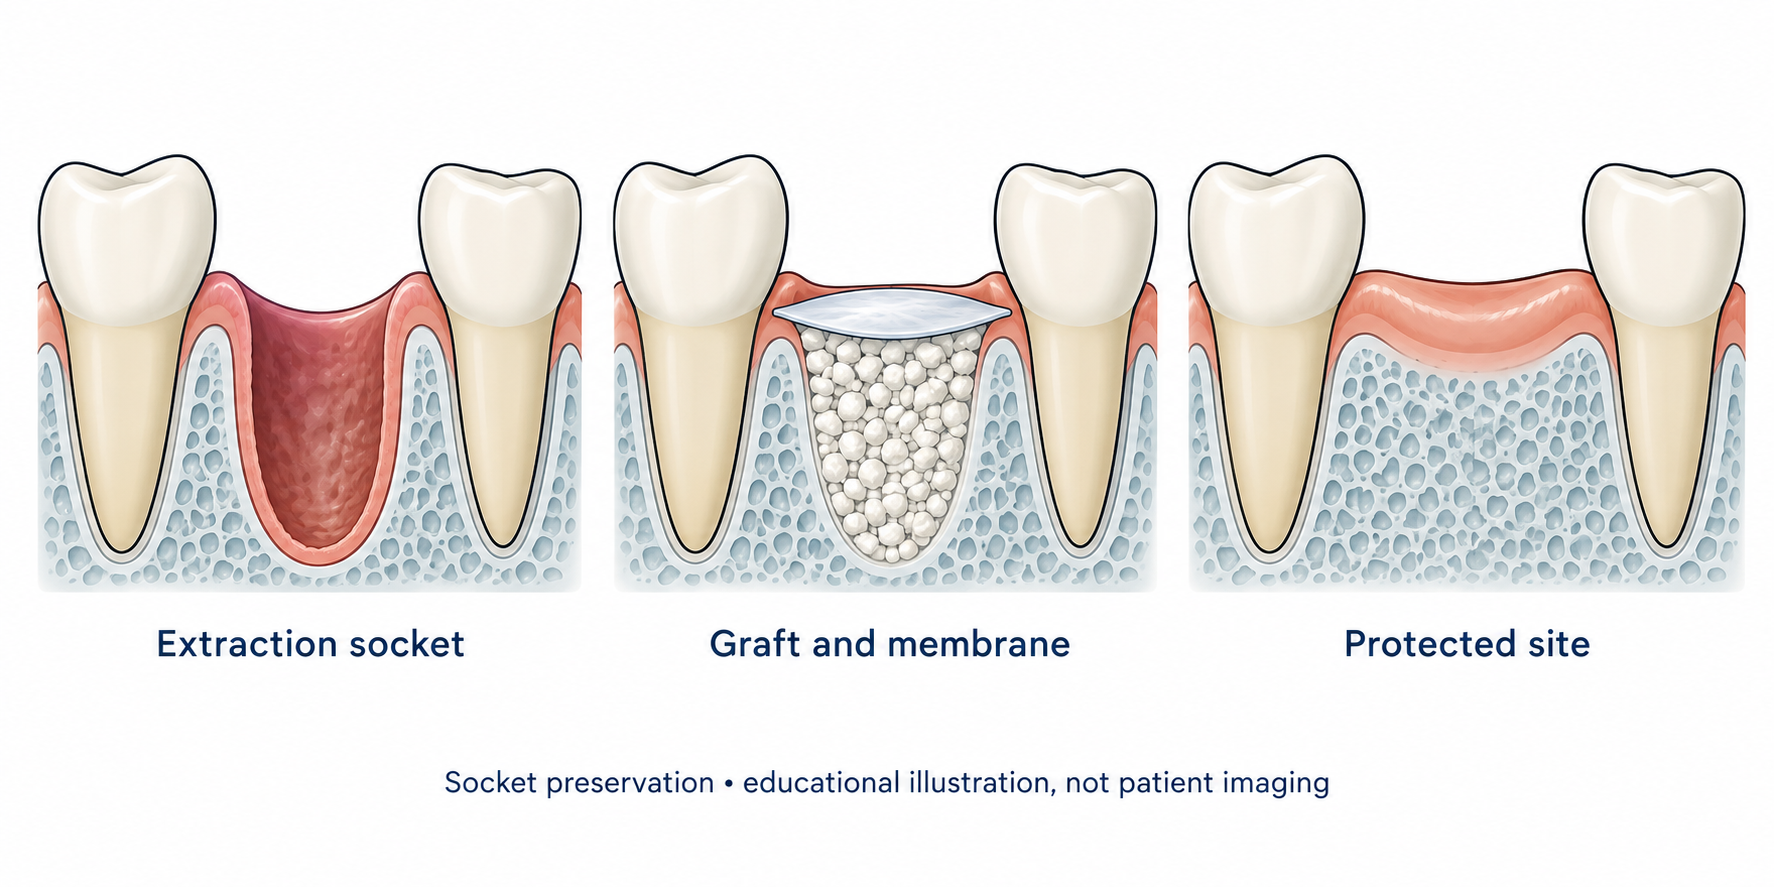
Socket preservation educational illustration

Socket preservation

Introduce the anatomy involved in an extraction-site conversation.

Selected shared-library artwork. Educational material has a different role from patient-specific clinical evidence.

How it fits the day

From a familiar document to a repeatable workflow.

  1. 01

    Choose a starting point

    Pick a starter or bring a document your practice already uses.

  2. 02

    Compose for the reader

    Arrange the sections, practice wording, visit information and images.

  3. 03

    Preview and select use

    Inspect the result and select the published template for the relevant workflow and clinician.

  4. 04

    Review each patient's document

    Confirm the facts, recipient and next steps before sharing or filing.

Your documents, alongside your existing record.

Templates shape the communication. Your team still reviews the result and chooses the supported delivery or filing route. Confirm the output formats and PMS connection you need during setup.

Explore supported connections →

A few practical questions.

Can we bring our own templates?

Yes. Start from an uploaded Word or PDF document, a specialist starter, a blank template or a copy of an existing template. Preview the result before selecting it for practice use.

What is in the educational image library?

The shared library contains 22 educational illustrations: eight for implants, four for wisdom teeth and extractions, six for gum and bone care, and four for root canal treatment. Practices can also add reusable images of their own.

Does changing a template rewrite existing notes?

Existing notes keep their version. Select a published template for future matching work and review each new patient document before sharing it.

Can an educational image replace patient imaging?

No. Educational artwork helps explain a topic. It is distinct from the patient's clinical images, findings and record, which the doctor reviews for the specific case.

See it with your practice in mind.

Walk through the workflow, the connection to your PMS and the setup your team needs.

Book a demo